Blink camera not recording: How to Fix it in minutes!
Security cameras have become common in houses nowadays. Blink camera is a famous line of outdoor and indoor cameras that are affordable and easy to use. People now prefer installing Blink cameras mainly for the security of their homes. But when a device works round the clock, it can face various issues. In case you are facing a problem with your Blink camera, we are ready to help you out.
There can be multiple reasons your Blink camera is not recording events or has stopped detecting motion. We will give you the information you need to know about the Blink camera, why it has stopped working, and what you need to do to fix it.
Check your current Blink subscription: Has it expired?
A possible reason why your Blink Camera is not recording is that your subscription package has expired or you haven’t purchased one.
Initially, when Blink camera came into the market, they had their free recording feature on the cloud servers. No user prefers purchasing a monthly subscription when they can have it for free. Blink became famous in the market because the brand offered each sync module with free storage for up to 7,200 total seconds or 2 hours. Besides, it was one of the few security cameras with zero recurring charges.
However, Blink became a subscription-based model on 16th April 2020. So now, you need to pay for its cloud storage for motion detection, video recording, and live view. There are two subscription packages: ‘Basic’ for $3 a month per device and ‘Plus’ for $10 a month for unlimited devices. Therefore, Blink cameras will not work if you don’t pay for either of the two subscriptions.
Blink has launched new devices, the Blink Video Doorbell, Mini cameras, and Outdoor, Indoor (gen 2). They come with in-built local; storage capability. In addition, the new cameras have a flash drive ranging from 1 GB to 256 GB to record and save footage. Thus, if you are using the latest Blink cameras, the unpaid subscription plan is not the issue behind your Blink camera not recording.
Are your Blink devices connected to the internet/Wi-Fi?
Blink cameras require strong signal strengths for optimum performance in uploading motion clips, viewing Live Views, and for excellent video quality. On that account, it is vital for the cameras to have 3 bars of connectivity to deliver smooth performance. Less than 3 bars for each connection creates unexpected camera performance issues.
The camera should have Wi-Fi (2.4 GHz) frequency to communicate well with the Wi-Fi router. Besides, it supports mesh and merged networks with a single SSID but transmits only on the 2.4 GHz band. The first step to solve this issue is to keep the Wi-Fi router closer to the camera. You may also install a Wi-Fi extender, booster, or mesh Wi-Fi.
Troubleshooting the connection
You can begin with power cycling the Wi-Fi router, tap the ‘Update’ button in the Blink app and see if the signal improves. However, if you still see weak signal strength, bring the Wi-Fi router and camera closer and try updating again. Repeat this to have the 3 bars of signal strength.
If the issue persists with uploading motion clips or video quality, the live view, there is network congestion. Therefore, you should try additional steps to remove a ‘bottleneck ‘of traffic from the devices.
- Disconnect or turn off the unused devices.
- Test the connection by temporarily switching off the music, video, video, or movie streaming and preventing bandwidth consumption.
Blink Camera Not Detecting Motion
The Blink Camera is perfectly installed at the preferred location. However, you have checked the field of view and it is not detecting any motion detection. In such cases, make sure that the motion detection is turned on. Blink camera has settings that enable it to record motion and send notifications.
Go to the Blink app, select the running man symbol, and click ‘Armed.’
A Blink camera uses Passive Infrared to detect heat signatures of objects in its pathway. When electrical equipment or object interferes with its signal, the camera cannot detect or record motion correctly. There are other settings and motion detection features you may have to check and turn on if the camera isn’t detecting motion.
Turn on the motion detection feature
There are two methods to enable the motion detection feature:
- You will find an option on the home screen at the upper right with a camera widget having a running man symbol. It will be a blue symbol if motion detection is enabled. Click on it if it is otherwise.
- The second way is present on the camera’s settings page. Go to this page by selecting the icon with three horizontal sliders present beside the running man icon of the camera. After you reach the Camera Settings menu, you will find the Enable Motion Detection toggle at the beginning of the options. Toggle it and turn it on.
What to do when your Blink camera is not working correctly?
Here, we have discussed some of the primary things you need to check when the camera is functioning irregularly.
Check the signal strength from Sync Module to Camera
The signal strength from Sync Module is very crucial. First, it receives data from the Blink servers through your Wi-Fi. Then, the command is sent to system devices with a Low-Frequency Radio (LFR). Besides the Wi-Fi having three bars of signal strength, the camera must have three bars of signal strength from the Sync Module to perform appropriately. This is because the camera first receives data from the Sync Module and later sends images and notifications through the local network.
Distance and obstacles can reduce signal strength. For example, putting the Sync Module behind building materials like concrete, steel, brick, stone, and aluminum can obstruct signal strength. Examples of poor locations are inside a basement or attic, behind a television, or on top of your wireless router.
The best way is to position the Sync Module in a central location so that it receives equally strong signals from the Fi-Fi router and cameras. Then, if needed, re-locate your camera.
To check the signal strength of the Sync Module, open the Blink app, scroll to the bottom and click on ‘Sync Module.’ Check the status there. If the signal has less than three bars, try these out.
- Unplug the Sync module, wait for 2 minutes, then plug it back in
- Replace the batteries of the Blink cameras
- Unplug the Wi-Fi router for 2 minutes and plug it back in
- Move the Blink cameras closer to Sync Module (cameras should be 100 ft. or less from the Sync module)
- Moving the Sync Module closer to the Wi-Fi router
- Reset the Sync module by pressing and holding the reset button for 10 seconds
Check for Latest Software Update
We recommend keeping the Blink app updated to its latest version. This enables the smooth running of the cameras without any lagging or programming issues. To update the Blink software, follow these steps:
- Start the Settings App
- Select General
- Click on Software Update
- Tap on Automatic updates
- Then swipe the button to the right and turn on the Automatic updates.
Henceforth, your Blink camera app will always remain up to date.
Check Misconfigured Activity zones
Objects in your surroundings, like a bush or tree branch, move often. Therefore, these objects can create false alarms. Blink camera allows you to mask off such zones from your camera view that should not detect any motion. Therefore, if the Blink camera is not detecting motion, you have the check the activity zone settings in the Blink Home Monitor app.
If you think this is the issue, you must reset the Blink app’s zones and fix them. Follow the steps accordingly.
- Go to Settings.
- Select Activity zones.
- Click on Reset zones.
Check Misconfigured Privacy zones
The privacy zone is the private place in the camera view you want to avoid viewing or recording in the Blink camera. This can be your bedroom door, neighbor’s door, or any other space that the camera should not stream live or record for privacy issues.
If any unwanted zone gets covered in your camera view, your camera will not record or stream live. The issue is easy to detect as the privacy zones are masked with grey color in the camera view. Therefore, check for any misconfigured privacy zones in the camera view and change the settings. To do so,
- Go to Settings.
- Select Privacy zones.
- Click on Reset privacy zones.
Note: The privacy zone feature is only available in the Blink Video Doorbell model, Indoor, and Outdoor Generation 2 cameras.
Check if the camera is set to armed
When you set it for the first time, a Blink camera is in its default state, ‘disarmed’ mode.
So, what does armed or disarmed stands for in Blink camera settings?
A Blink camera system detects and records motion while in ‘armed’ mode. Suppose you have enabled motion detection in the camera settings, but it is not detecting motion. This happens when the camera is in ‘disarmed’ mode.
Henceforth, arm your Blink camera with the following steps.
- Go to the Camera view.
- At the bottom of the screen, toggle the option from ‘disarmed’ to’ armed.’
- Next, click on the running man option to turn it blue. This shall set the motion for the ‘Garage’ camera. If you see the running man option in grey, then the motion is off for the view.
Check if your camera is within Motion Detection Range
For proper detection of the Motion Detection Range, it must remain within the appropriate range.
Although, factors like camera placement, app sensitivity settings, infrared illumination, object size, or object temperature may affect the camera’s motion detection. The maximum motion detection range for all Blink cameras is around 20 feet
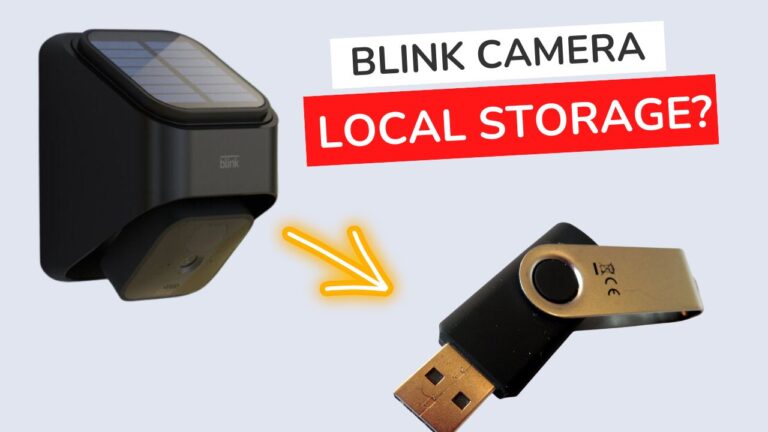
Blink camera recording not saving to USB
USB drives are commonly used to save your recordings and clips of the Blink camera. However, if the clips are not saved, there is a possible chance of the dive being corrupted. Internet lags during recording saving can cause this issue. You can troubleshoot the USB drive in such scenarios. Remember to select the Safe Eject button in the app while removing the USB drive from the Sync Module.
Is your USB drive compatible with your Blink device?
Sometimes, you may use a USB drive that is incompatible with the device (SD cards, hard drives, etc., are not compatible). With the Sync module 2, use any USB flash drive up to 256 GB. Flash drives can be 2.0 or 3.0.
Wrapping Up
As we discussed, the Blink camera can stop working due to minor or major issues. One needs to start inspecting the basic defaults and then go towards the internal ones. Most problems have easy fixes and can be resolved by their owner. So, make sure you follow the steps given above carefully and fix your Blink camera today.