Blink Camera Not Working: Easy Fixes to 11 Common Issues
Having a personalized security system is like having a third eye. It looks after your house, both indoors and outdoors, keeps tabs on your toddlers, and helps you concentrate on your work without having to worry who might turn up unannounced from the back door unannounced.
Thanks to Blink Camera, this dream is now a possibility. With its vast selection of security devices, Blink has made our life easier and more convenient than ever.
Right now, you can purchase one for just $99.99 from any online retailer like Amazon and enjoy seamless security and connectivity.
But what if your device is not working correctly?
Maybe it’s not connected to the Wi-Fi, having signal issues, or the motion control isn’t working. What then? Don’t worry because we’re here to help you out. Today we will discuss all the possible issues that your Blink Camera might incur and how to troubleshoot them within seconds.
Thus, without further ado… Let us begin.
Blink Camera Not Working!!!
Like any other gadget out there, the Blink Camera is also prone to technical problems and glitches that can be fixed immediately with proper guidance.
Some major reasons your Blink Camera might not be working are:
- It is facing low network issues.
- The Software isn’t up to date.
- The Sync module has been overridden and needs to be fixed.
- The device needs a hard reset.
- Internal functions like Motion detection and Night Vision aren’t working.
- The device is facing internal issues due to circuit malfunctions.
- The device is out of power, and
- Others.
We will address each of these concerns individually and guide you on how to solve them right away.

Poor Signal Strength
This may occur if you have moved your device far from your home’s wifi network.
The cloud-based Blink camera requires a constant connection to a wifi signal to record and preserve recordings.
When the device blinks red every three seconds, it’s a warning that it’s not receiving the right signal.
To remedy this:
- Launch the Blink app on your smartphone, then look at the Camera’s “live view.
- To view “live view,” click on the camera icon on the left. If a video plays, the Camera is operational, and signal strength is unrestricted.
- Your device’s signal is deteriorating if there isn’t a live video feed.
- First, select the settings icon on the Camera to check the signal strength. At the bottom of the screen, under the Status option, select “Update.”
- To check the signal strength of your Sync Module, go to the Blink app’s Home screen and scroll down until you see “Sync Module.”
- You can monitor your Sync Module’s signal status right at the top. Simply click it. The absence of blue bars indicates that the Camera is not linked to a signal grid.
- Bring your Camera close to the wifi and wait until there are three blue bars on the signal strength display.
By doing this, the device should get back in sync with the wifi network.
If this doesn’t work, try restarting the device and trying again. The signal should be restored now.
Blink Camera not recording video
The Blink Camera might now record video if any of these situations occur.
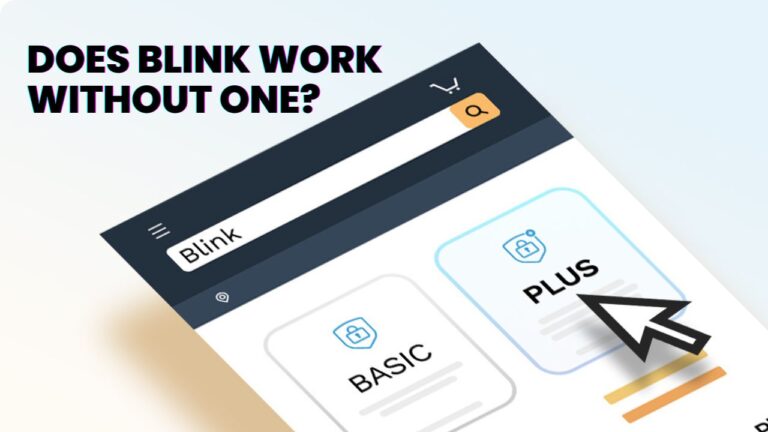
Subscription out of date
Blink will only provide Live View without a monthly or annual subscription, and no recording options will be available.
To avoid this, check the Blink App > Subscriptions > Manage Subscriptions. If the subscription is expired, then be sure to buy more.
The device is not powered on
The recording will not happen if the device is not armed. So make sure your device is switched on and giving a Live View before recording something.
Mounting issues
The device needs to be mounted on a proper surface, with plenty of room to have a wide field of View. If not, there will be a partial recording.
Sometimes the View might be obstructed due to the misconfiguration of active and privacy zones. To avoid this you can alter the motion detection settings on your device.
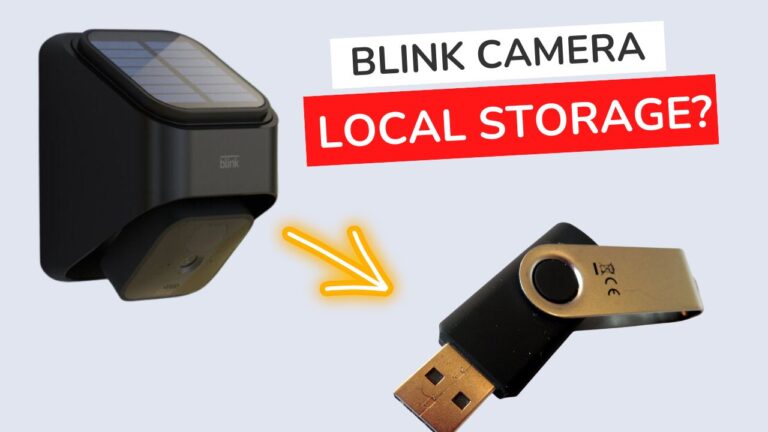
Blink Camera not recording video to USB
The Blink Cameras have a USB recording option that lets you directly record live footage on a USB drive. But, sometimes, this isn’t possible due:
Faulty USB Device
Check your USB drive, and if needed, format it or change its properties from FAT to NTFS format or vice versa.
Faulty Driver
In such cases, the Blink Camera’s internals isn’t working properly. So, it’s best to contact customer support.
Motion Detection not Working
Blink Camera has numerous sensors and motion triggers for active motion detection.
It’s designed with a particular algorithm to recognize sudden movement and alert the owner to potential risks. Only when a sudden movement is noticed will this motion trigger be activated.
The blinking red light on the face of the device indicates that the device is tracking motion. If the red light isn’t showing up even when you toggled Motion Detection, then follow these steps:
- Firstly, check the signal strength of the device. If the signal display shows more than or equal to two bars, signal strength isn’t an issue.
- Open the app and click on the “running man” icon.
- Ensure the device is armed. You can check this by going to the live View. If a video feed is available, then the device is armed.
- Turn on Motion detection.
Sometimes the Motion Detection fails to work properly due to misconfiguration in activity and privacy zones.
These misconfigurations can be triggered by continuously moving objects like a fan or a tree branch swaying in the breeze. Whereas privacy zone misconfiguration occurs when the Camera catches the View of something it’s not meant to do. Like the neighbour’s door all across the street.
The best thing to do here is reset the activity and privacy zones whenever false alarms occur. To do so:
- Open the Blink app on your Smartphone or Tablet.
- Make sure the Camera is armed.
- Go to “Settings”.
- In settings, go to “activity zone” and “privacy zones”.
- Tap on “Reset Zones”.
Infrared Sensors not Working
Blink Camera uses Passive Infrared(PIR) technology to detect motion under lowlights and dark settings. In this method, the sensors pick up the thermal reading from the surroundings to create input.
But these PIR sensors are not very effective; thus, the PIR will malfunction whenever a glass surface comes in front of the sensors.
This usually happens due to drastic changes in the density of mediums from air to glass. The change in mediums causes the wavelength to reflect and refract. Thus, proper thermal imaging isn’t possible.
To avoid this:
- Never point a Blink indoor or mini Camera out the window from inside your house.
- Purchase a Blink outdoor camera, then install it outside your home to detect exterior motion.
- Never direct your devices toward the sun or any other source of light.
- Don’t place your device near a source of fluorescent light.
- Always mount your Camera at the upper-mid level of the room so any stray light may not affect the performance of the PIR.
- Avoid mounting your Camera at the ceiling to avoid stray lights and trigger malfunctions in privacy zones.
Night vision not working
The night vision on Blink Cameras might not be the best in the market, but it certainly does the job.
In most cases, whenever the Might vision is not working, it can be due to an issue with the PIR sensor or a software issue.
To remedy this:
- Firstly make sure that Night Vision is turned on.
- Open the Blink app on your Smartphone or Tablet.
- Make sure the Camera is armed.
- Go to “Camera Settings”.
- In the Setting, go to “Night Vision” and turn on Night Vision. You can also switch it between auto or manual, spending on your needs. We recommend using the auto function.
- Then go to “Sensitivity” and turn it up to 7 or 8. This will be automatically triggered under low light conditions.
Sometimes, turning the sensitivity up can increase the chances of getting false alarms. In such cases, you can buy an IR Flood Light and attach it to the Camera for better thermal imaging.
Live View not working
The Live View of your Blink Camera might now be working due to low network, bad wifi, or Software Issues.
To remedy this:
- Firstly, check the signal strength of the device. If the signal display shows more than or equal to two bars, signal strength isn’t an issue.
- Try to restart your wifi and reconnect with the Blink Camera.
- If these two don’t work, open and then try updating the Software of the device using the Blink App or reinstalling the app.
Sync Module not working
Due to interference in the network or the addition of a new network, the Sync Module might be offline.
To fix this:
- Open the Blink app on your smartphone or tablet, and you will get a notification that reads “Sync Module Offline.”
- Tap the banner to go to the Sync Module Offline screen.
- Ensure the wifi connection is active. Restart the router, then wait until the internet is operational once more.
- Ensure your sync module’s solid green and blue lights are active. If you see more light patterns, power cycle your Sync Module by disconnecting it for 10 seconds and then plugging it back in.
- The Sync Module should reset in 45 seconds and display a solid green and blue light.
- If there are no lights at all, try a different power source.
- If your Sync Module goes offline once more, try moving it closer to your wireless router. Look at the Sync Module status screen; you require a signal strength of at least 3 bars.
- After tapping the Sync Module Status button, use the Help/Troubleshooting link to proceed to the Sync Module settings screen. Here, you can stop the system from sending offline notifications, ask for an email with detailed troubleshooting instructions, or reset or change the wifi network that the Sync Module was connected to.
- Continue to comply with the instructions displayed on the screen.
Your Sync Module may have been corrupted or overwritten if the Sync Module is still Offline even after reconfiguring the wifi network.
Blink Camera Sync Module Reconfiguration
A reconfiguration of the Sync Module is required when the wifi reconfiguration approach fails. To bring the Module Online during this procedure, you must uninstall and reinstall the Sync Module.
To do so:
- Open the Blink app on your smartphone or tablet, and you will get a notification that reads “Sync Module Offline.”
- Tap the banner to get to the Sync Module Offline screen. You see the information screen for the Sync Module.
- Locate the “Delete Sync Module” option and click on it to open a new window.
- When prompted for confirmation, select “OK.”
- To wipe a Sync Module, you must enter or scan its serial number. The number label is located on the back of the Sync Module.
- After entering the serial number, press Continue.
- You are prompted one last time with a popup to confirm your answers. Press “DELETE.” The Sync Module has been removed from your account. Your Sync Module’s system still has any cameras or other devices linked to it when it was attached. Once a Sync Module is connected, the cameras will resume regular operation.
- To add a Sync Module, go to the Home screen and tap the “add device” (+) button in the top right corner.
- The “Add Device” page is displayed.
- Tap on “Blink wireless camera system”.
- Once again, you will have to enter the serial number of your device.
- Tap Continue after entering the serial number.
- Select the previously used system from the “select a system” menu. It will be kept in the application.
- The app will now ask you to plug in your Sync Module or Mini Camera if it isn’t already attached. About 30 seconds after being plugged in, a constant green light pattern and a blue light pattern with flashes appear.
- To find available networks and devices, click “Discover Device.”
- When connected to the Blink app, the Sync Module displays a list of wifi networks that it can recognize.
- Choose the password that the Blink app is presently using and enter it.
- In the ensuing box, select Join.
- The message “Sync Module added to your system” will appear in a new window.
- Finally, click “Done.”
Blink Camera Physical Reset
Sometimes resetting the device with the app or the Sync Module might not get the device online and working like before. That’s where a hard reset or physical reset comes into play.
To do so:
- On the device’s back side, you can find the reset button.
- Press the physical reset button with a blunt stick or your fingernail.
- At first, the red light will blink, followed by steady green light at the front of the Sync Module after 15 seconds.
- Finally, a flickering blue light will pop up, denoting a successful reset.
Setting up a Blink Camera
Peripheral devices can occasionally reset by themselves due to some software glitches or network issues. This issue is most common when connecting your Blink Camera with a new Wi-Fi.
If it takes the gadget a while to switch itself off after an extended period of continuous red blinking. Then, it’s a hint that your Camera’s settings for wifi or other output devices are incorrect.
In such circumstances, the prior configuration is lost, and you must reset the Camera. To do so:
- On the smart device of your choice, launch the Blink app.
- In the top right corner of the Home screen, click the plus sign (+). This will enable you to add a new device.
- The Add Device page displays a list of potential devices for your Blink system.
- Select “Wireless Cameras” next.
- The Camera on your phone will start to open, and you’ll be taken to a screen where you can scan QR codes.
- You have two options: manually enter the serial number or scan the QR code with your smartphone’s/Tablet’s Camera.
- If the QR code or serial code is entered successfully, the camera setup process will begin immediately, and the app should indicate that your Camera has been added.
Blink Camera not powering up
This is most likely to happen if the batteries on your device are exhausted.
Even though the device is pre-configured with batteries that can last up to 2 years, batteries occasionally deplete before the specified period. Heavy usage is frequently to blame.
A way to get around this issue is by connecting the Camera to a power outlet via the provided Type C to Type A cable. But, it limits the mobility of the device. Thus, replacement is an absolute must.
To replace the batteries on your Blink Camera:
- Launch the Blink app on your smart device, then click the camera settings icon (located to the right of the “running man” icon).
- At the top of the Camera Settings screen, immediately beneath “Monitoring,” is a section titled “Battery.”
- This will let you know if your batteries are “OK” or “NEED REPLACEMENT.”
- If the battery tab reads “OK,” there is no need for concern; if not, get the batteries changed as soon as possible.
- Unmount your device from the surface and open the back panel using your finger or an opening key available in the box.
- After opening the device, replace the old batteries with new AA lithium-based batteries.
- Close the lid and turn on your device.
NOTE: Please do not use Graphite-based batteries on your Blink Camera. They won’t fit properly, plus they will get exhausted quite fast.
Blink Camera Software Update
The Blink Camera comes with preinstalled Software that needs to be updated continuously to get the best results.
To update the Software on your Blink Device:
- Open the Blink app on your Smartphone or Tablet.
- Make sure the Camera is armed.
- Go to “Settings”.
- Press “General”.
- Select “Software Update”.
- Select “Automatic Updates”.
- Swipe the button to the right to enable Automatic Updates.
Is the blink Camera Still Not Working?
If you have tried everything and yet your device isn’t functioning properly, there might be some issues within the circuits or drivers of the device.
In such cases, do not attempt to open the device yourself. Opening the device up without proper guidance may manage the internals and void the device’s warranty.
The best remedy is to contact customer support or buy a new device.
Blink xt2 Camera not working
Error messages like “Camera Busy” or “Thumbnail Failed” may appear if one of your Blink cameras isn’t working.
It usually happens when the Sync Module can’t communicate with the device. To solve this issue:
- Bring the Camera up near the Sync Module. Ensure that “Camera to wifi” and “Camera to Sync Module” have 3 bars of signal strength.
- You can power cycle both devices by unplugging your modem and router for 30 seconds and then plugging them back in. When Internet service has been restored after two minutes, try using your Camera again.
- Reset your Camera’s power.
- Reinstall the batteries after removing them for 10 seconds. Make sure your Camera reacts to commands by checking.
- Try using a new power source if the previous methods don’t work to solve the problem. The Camera may be powered via a micro USB connection and a USB power adapter. Please give it a try without the batteries.
If the issue persists, please contact customer service for further help and guidance.